This is an old revision of the document!
Table of Contents
Parent Web
Accessing the Site
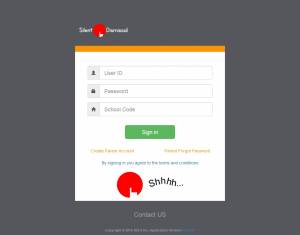
The specific web address for accessing the information for your school may be obtained from your school staff. Silent Dismissal does not provide this information to parents directly. Once you know the web address for our school, any modern browser, including those on mobile devices, should work.
Creating an Account
 You can quickly determine if your school does not support parent access by navigating to the web page and looking for the orange links titled Create Parent Account and Parent Forgot Password. If these links do not appear, then your school does not support web access and you will be required to obtain the mobile app from either the Google Play store or the Apple App store.
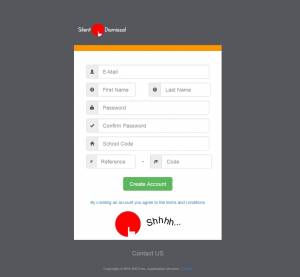
Click on the Create Parent Account to create your account. In order to proceed, you will need to have a valid e-mail address and will need to know the school code and reference code for at least one child. Additional children may be added after your account is created.
 Enter your e-mail address in the first field. This will be your account ID and will be used to send your password in the event you have forgotten it. Each e-mail address may be used only one time. If you have already registered an account with your e-mail address, you will need to recover the password for that account as a new account with the same e-mail address cannot be created.
Enter your first and last names into the appropriate fields.
For the password, choose something secure but also something that you will be able to easily remember. Do not reuse your password from other accounts, in particular from any financial or mail accounts that you may have. Silent Dismissal stores these passwords in unencrypted text so that we may send your password to you via e-mail in the event you have forgotten it. For this reason, it is important to use a distinct password for your Silent Dismissal Parent Connect account.
You will need to enter your password two times to ensure that you have entered it properly. Do not include any spaces in your password.
The school code may already be filled in for you on the page. If it is not, you will need to obtain this information from your school. Type the code in exactly, noting the specific usage of uppercase and lowercase letters.
The combined Reference-Code fields are associated to a single student. It is not possible to register for an account without having a valid student Reference-Code. Student Reference-Codes are used to associate students to accounts. Protect all of your student Reference-Codes as you would something like your back card PIN as anyone with the code can access associate your child to his or her account.
After the information has been entered, press the Create Account button. If everything is correct, you will be directed to your portal page. If not, read the error information provided then try again.
Portal Page
 Your home portal page is comprised of four informational areas with four main functions that may be performed.
Areas
School Information
This block contains information that you cannot change. It is information provided by the school such as the school name and address, along with the primary contact for supporting Silent Dismissal.
Account Profile
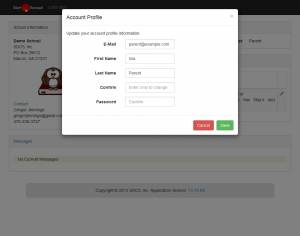
 This is you information. It shows your e-mail address and your name that you entered when you created your account.
You may click on the pencil icon to edit your account information, including changing your password. This is the first of three functions that you may perform.
Students
 The Students section lists all of the students associated to your account. By default, when you first create an account there will only be a single student listed.
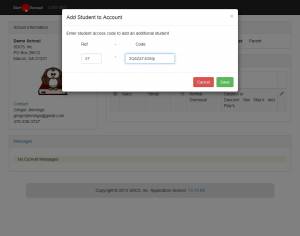
Click on the green plus indicator to add an additional student. In order to add an additional student, you will need to have the student Reference-Code. After entering the reference code and pressing Save the student section will update with the current students. If a new one has been successfully added, he or she will appear here. If an error has occurred, a yellow message will appear at the top of the screen. = Columns = Each student is shown with seven (7) columns. The first and last of these are hyperlinks to Set Explicit Dismissal and Student Profile, respectively. Each of these are discussed in more detail later.
The First Name, Last Name, and Car ID should be self explanatory. Depending upon the settings for your school, you may be able to edit these values on the Student Profile page.
Status Each day, the status for every child reverts to Normal Dismissal. In this configuration the child will always have Carpool available and may have one or more group assignments.
If your child is configured only as a carpool car rider for the current day and will be riding in carpool today, then no action is required.
Similarly, if your child is configured for only a single group for the current day and that group assignment is correct, then no action is required.
The status value will change when specific information about the student is entered.
Today The Today column displays the current assignment for each child for the current day. When Normal Dismissal is in effect, the child will always show Carpool as an available dismissal method. As many different groups the child is assigned for the current day will also show.
If an Explicit setting has been made for a child, only that specific value will be shown in the Today Column
