Table of Contents
Override
These instructions apply only to the role Local Admin
By Student
In most instances an override is set for a single student at a time.
To perform this action:
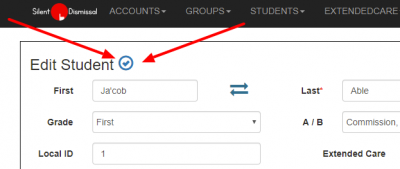
- navigate to Students / List
-
-
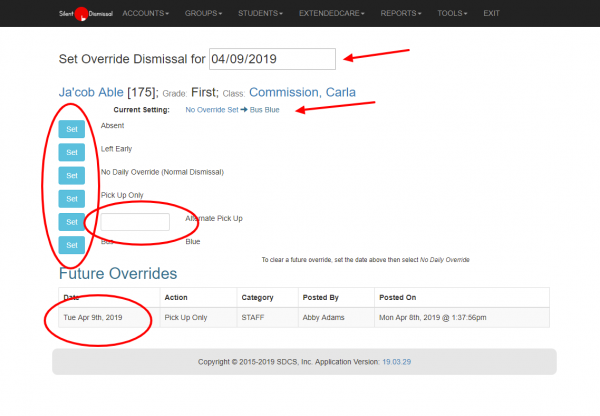
- The top field sets the date that the override should apply
- The second row displays the student's name, pick up ID number, grade level, and classroom assignment
- Immediately below is the setting for the current day
- The various Set buttons are listed below
- Absent and Left Early are equivalent to having the classroom teacher enter this information on the participation screen
- No Daily Override clears the override for the listed date. If future dated overrides exist, they may be cleared by selecting the same future date then selecting No Daily Override (Normal Dismissal)
- The alternate pick up ID selection allows for a student to be picked up with a different number than the normal value
- The input field on this name requires a different but valid pick up ID value
- Following the alternate pick up ID section there may be additional options
- The options are the groups to which the student is assigned, either for one or more specific days of the week or not for any specific days of the week but associated so that the student may be overridden into the group
- Future Overrides
- If any overrides have been set for the student for dates in the future, the information will appear here
- Set the date at the top to match the date for an override and select No Daily Override (Normal Dismissal) to clear a future dated override
By Group
In some circumstances it may be necessary to enter many student overrides into the same group. An example of this is a group that children are selected daily to be a member such as a special activity.
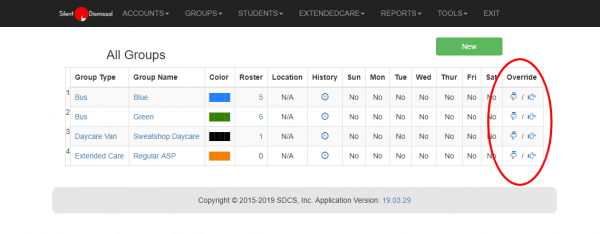
Selecting the Group
Setting overrides for a group in this manner may only be done for the current day by selecting one of the two icons in the right column.

If such a group has a pool of 30 students but on any given day the section may accommodate only 8 students then all 30 students may be associated to the group as optional students and then only the 8 selected students may be overridden into the group. For these instances, the icon of the hand pointing down is selected, which produces a list of only those students with some form of association to the group.
When a group needs to have students overridden into the group from within the entire student body, select the right pointing hand icon which then provides a list of every student in the school.
Selecting the Students
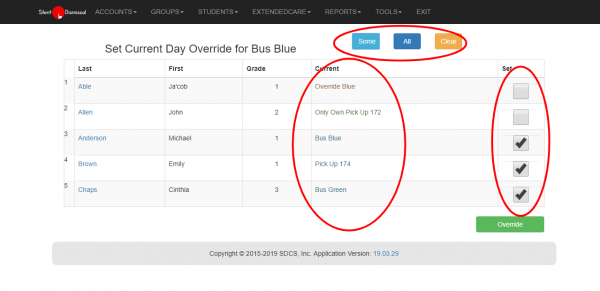
Irrespective of which of the icons is selected, the screen will look similar to this example.

- Buttons at the top
- Some - this will select all students that do not have an existing override for the current day
- Note the values in the Current column to see the current setting for each student for the current day
- All - this will selected all of the students listed below
- Clear - this will clear any check boxes currently set
- Note that this does not clear overrides of students set for the current group
- To clear the overrides it is necessary to edit the students individually then by selecting either No Daily Override or by changing an existing override into a new group
- Right column check boxes
- Set checkboxes adjacent to each student to be overridden into the group for the current day
- Click on the Override button at the bottom of the page


